Restoring Chapline House
About Chapline House
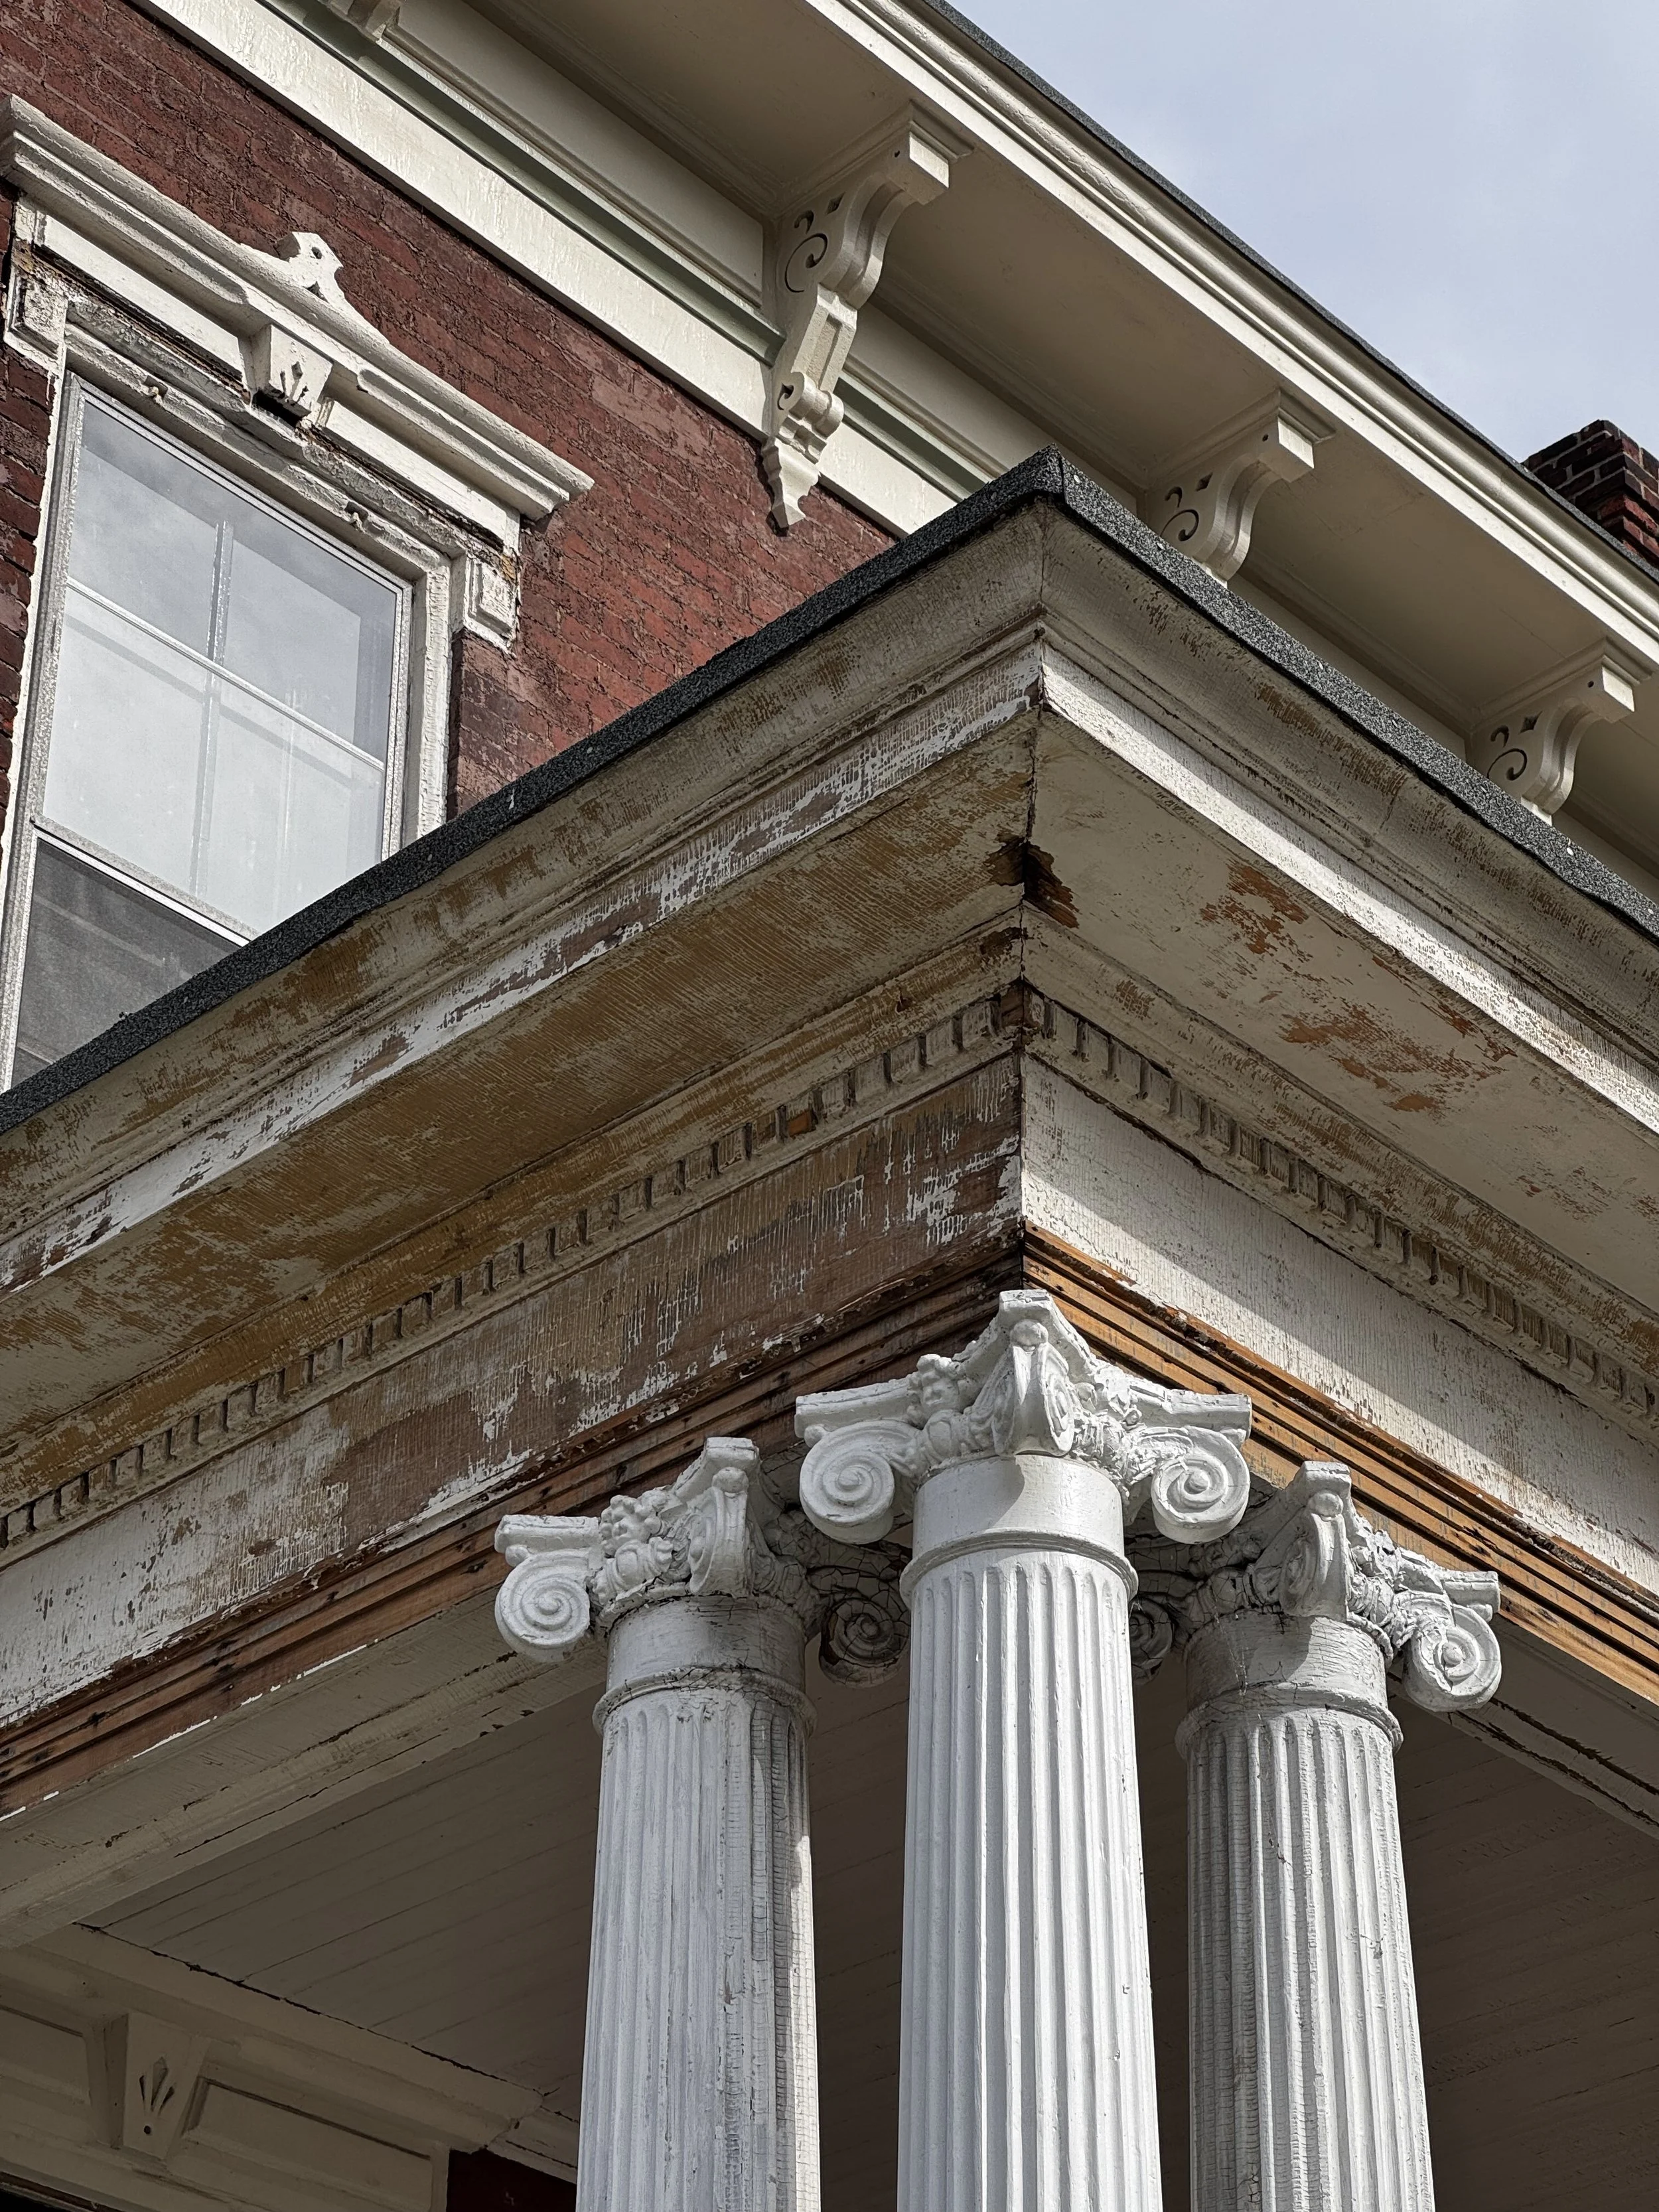
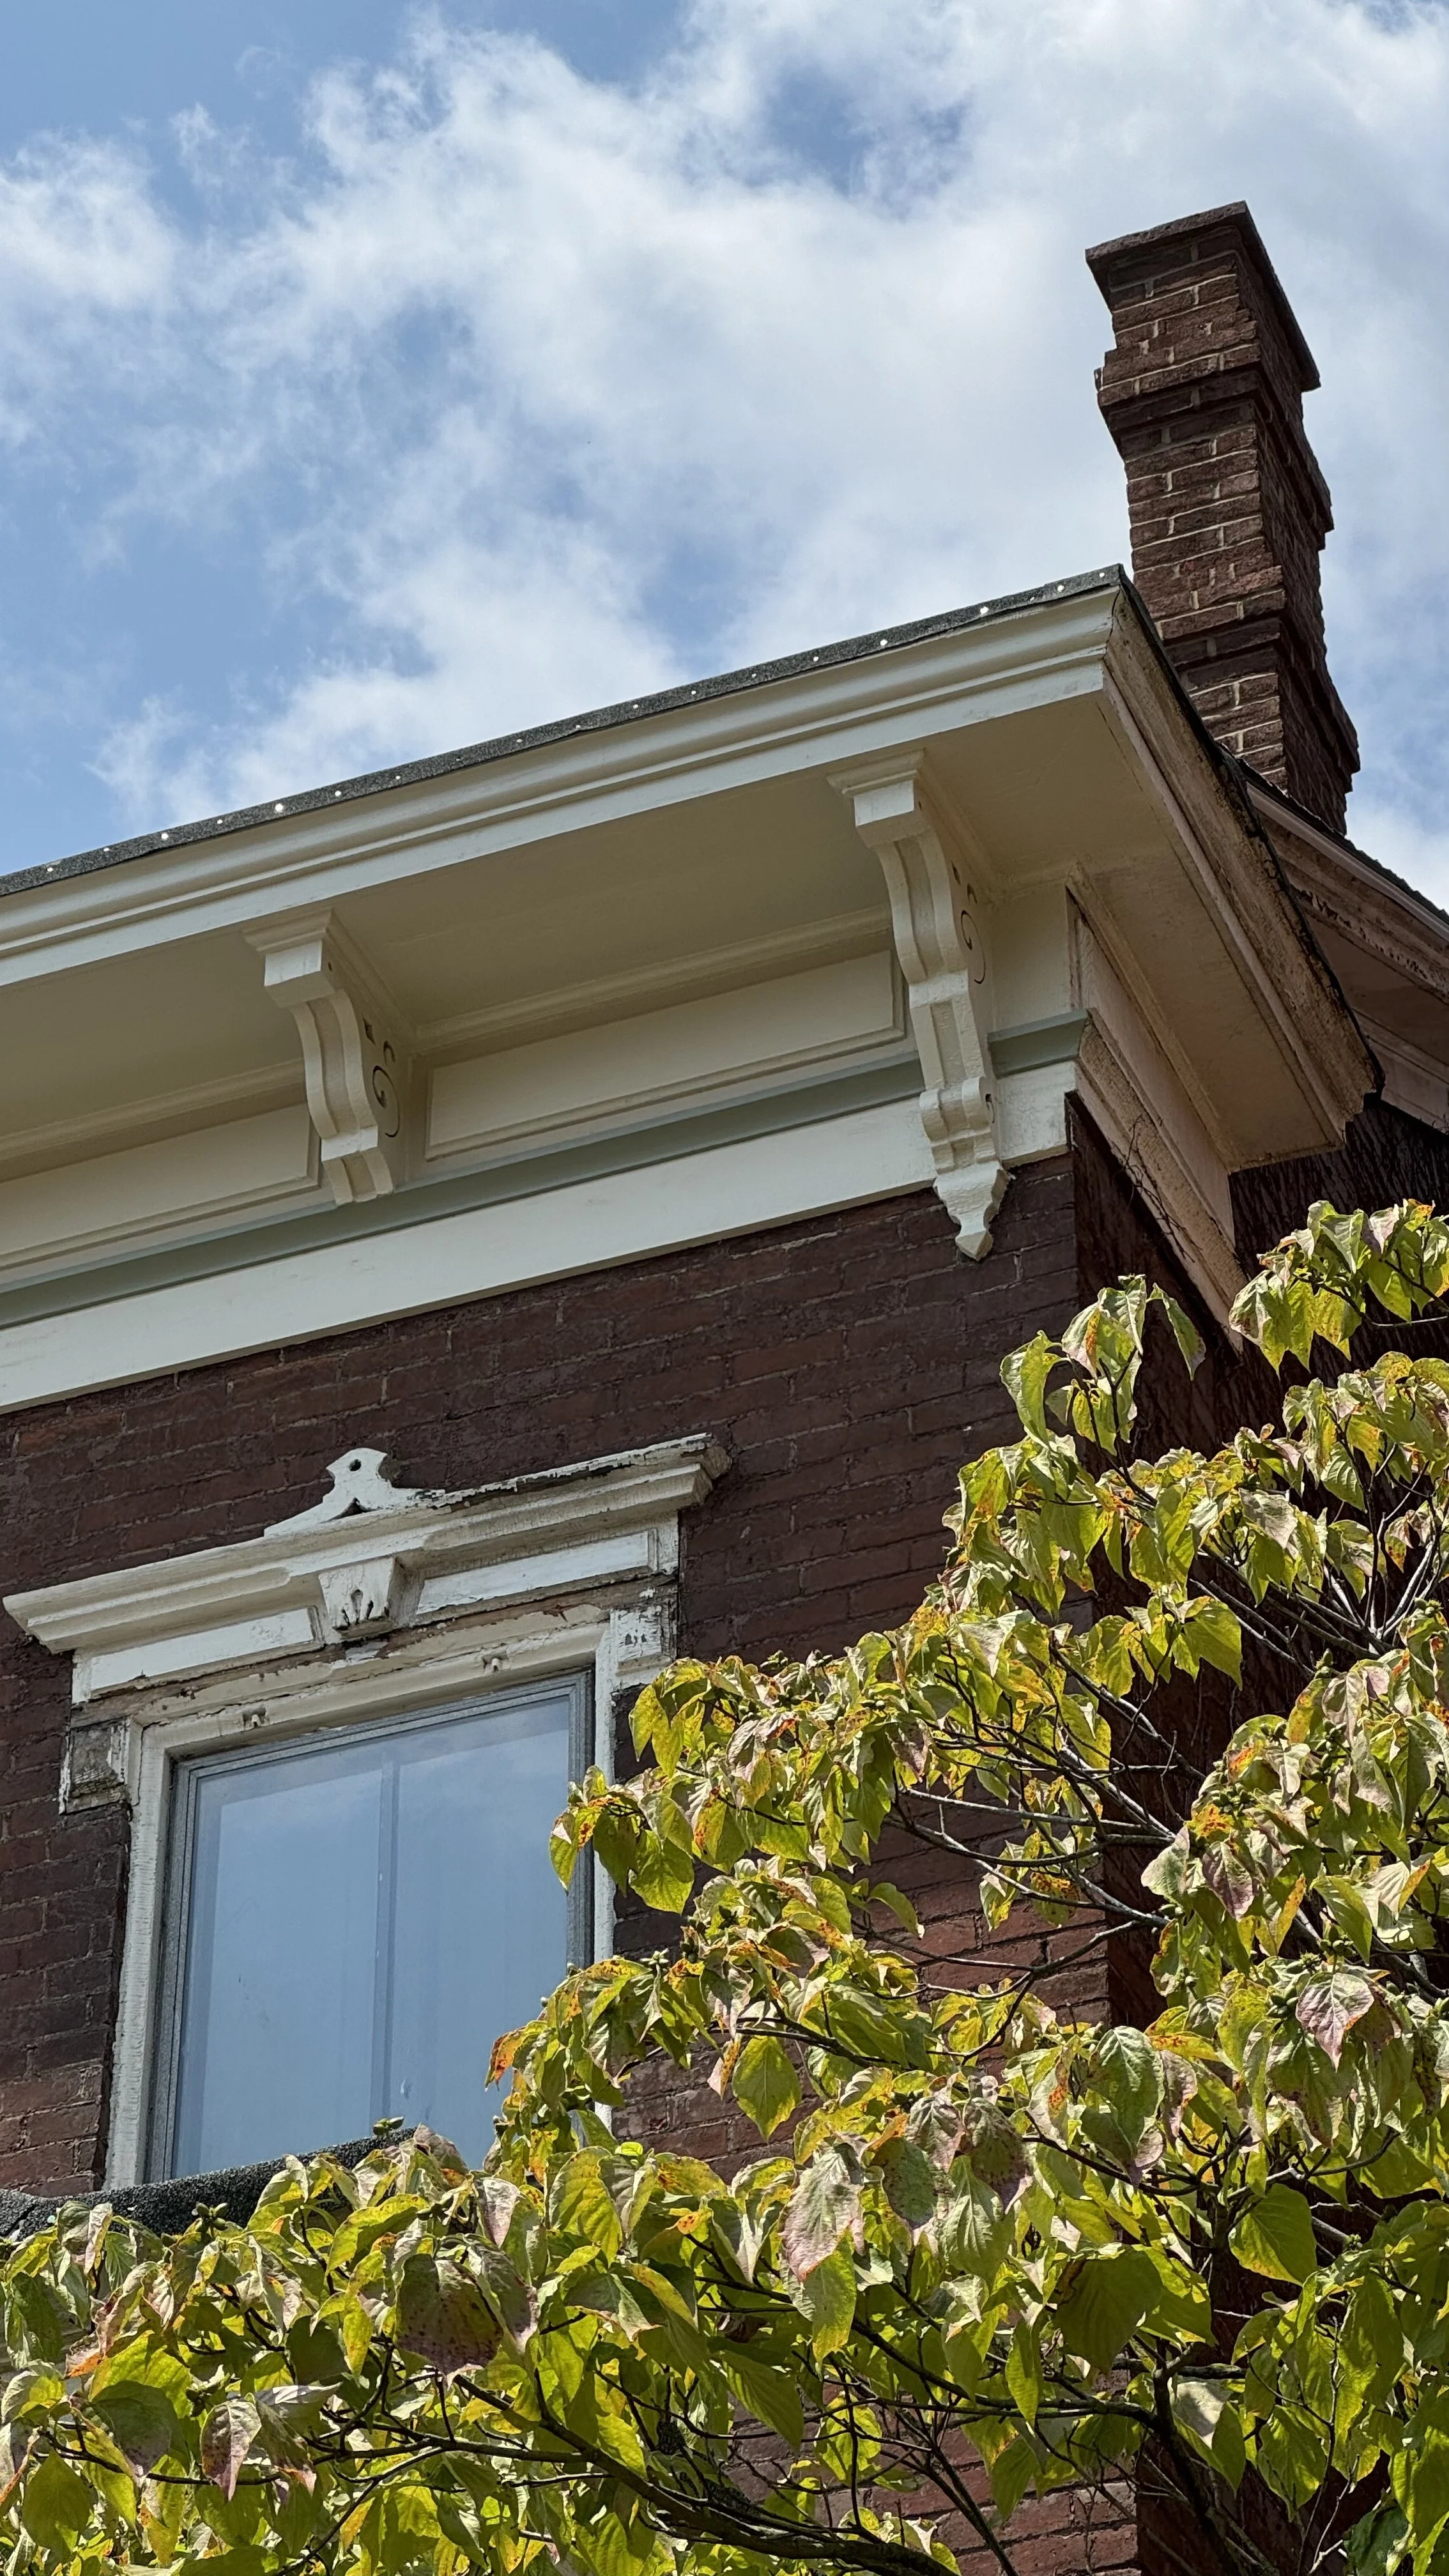
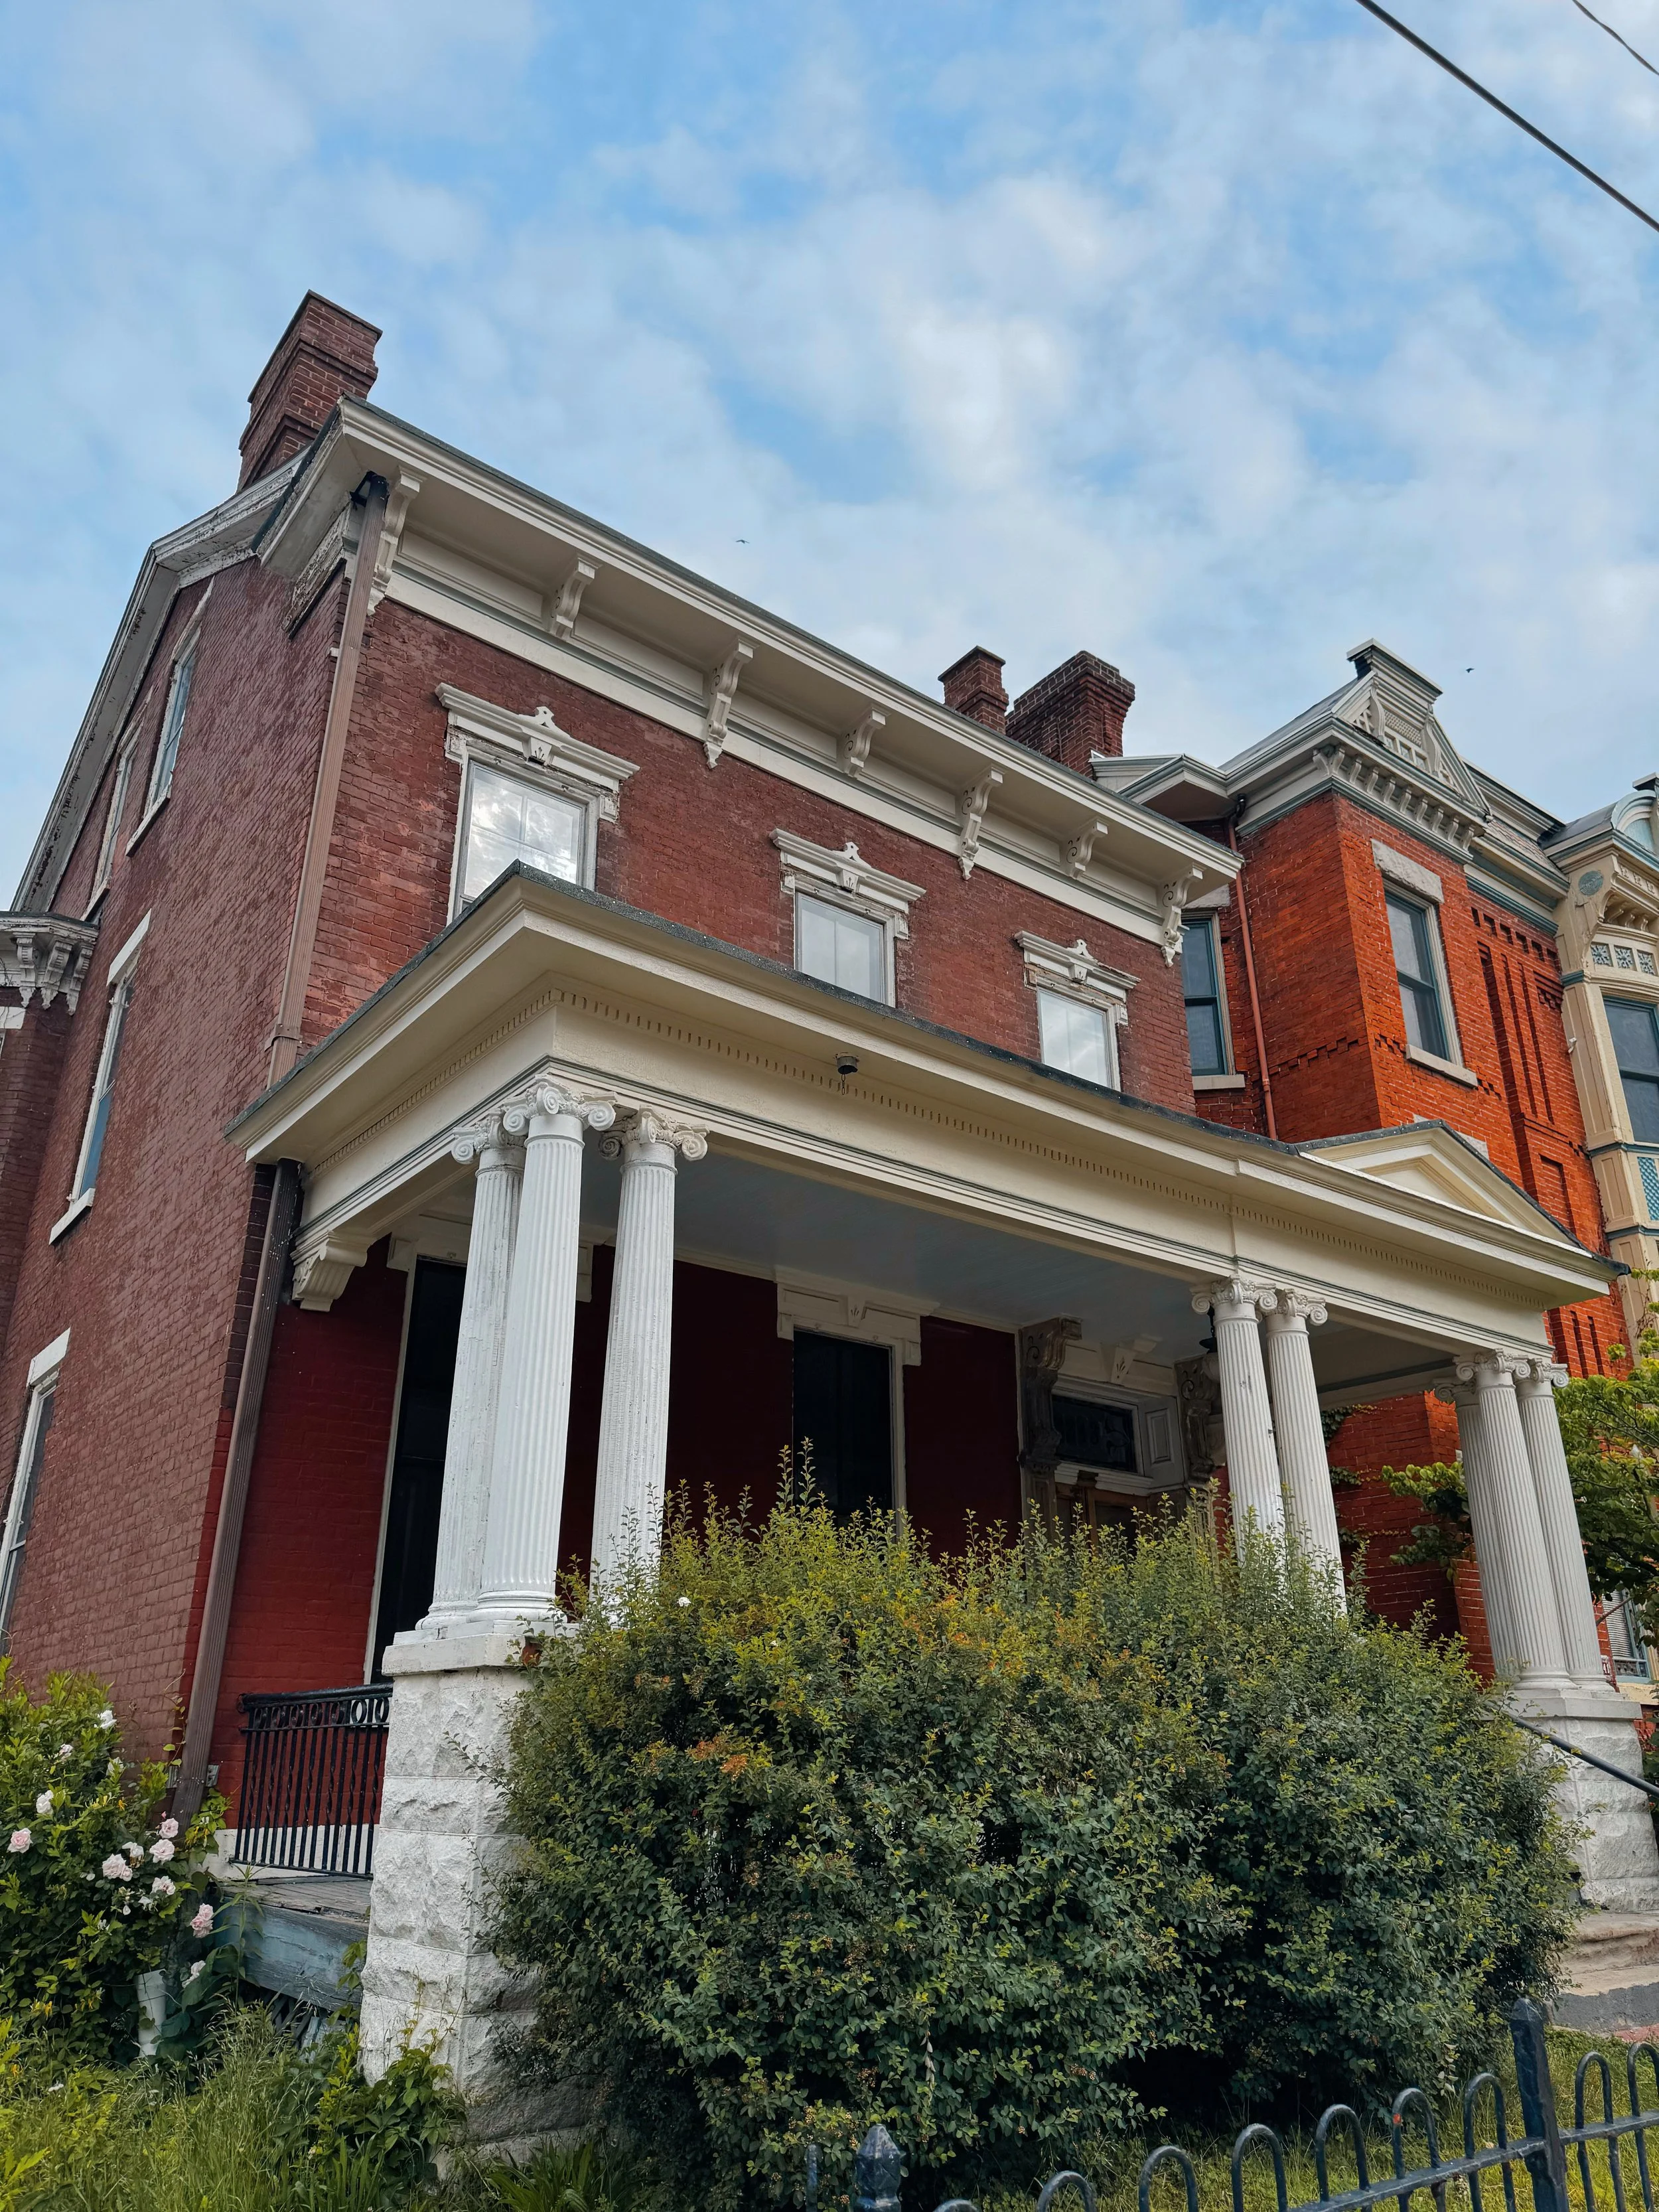
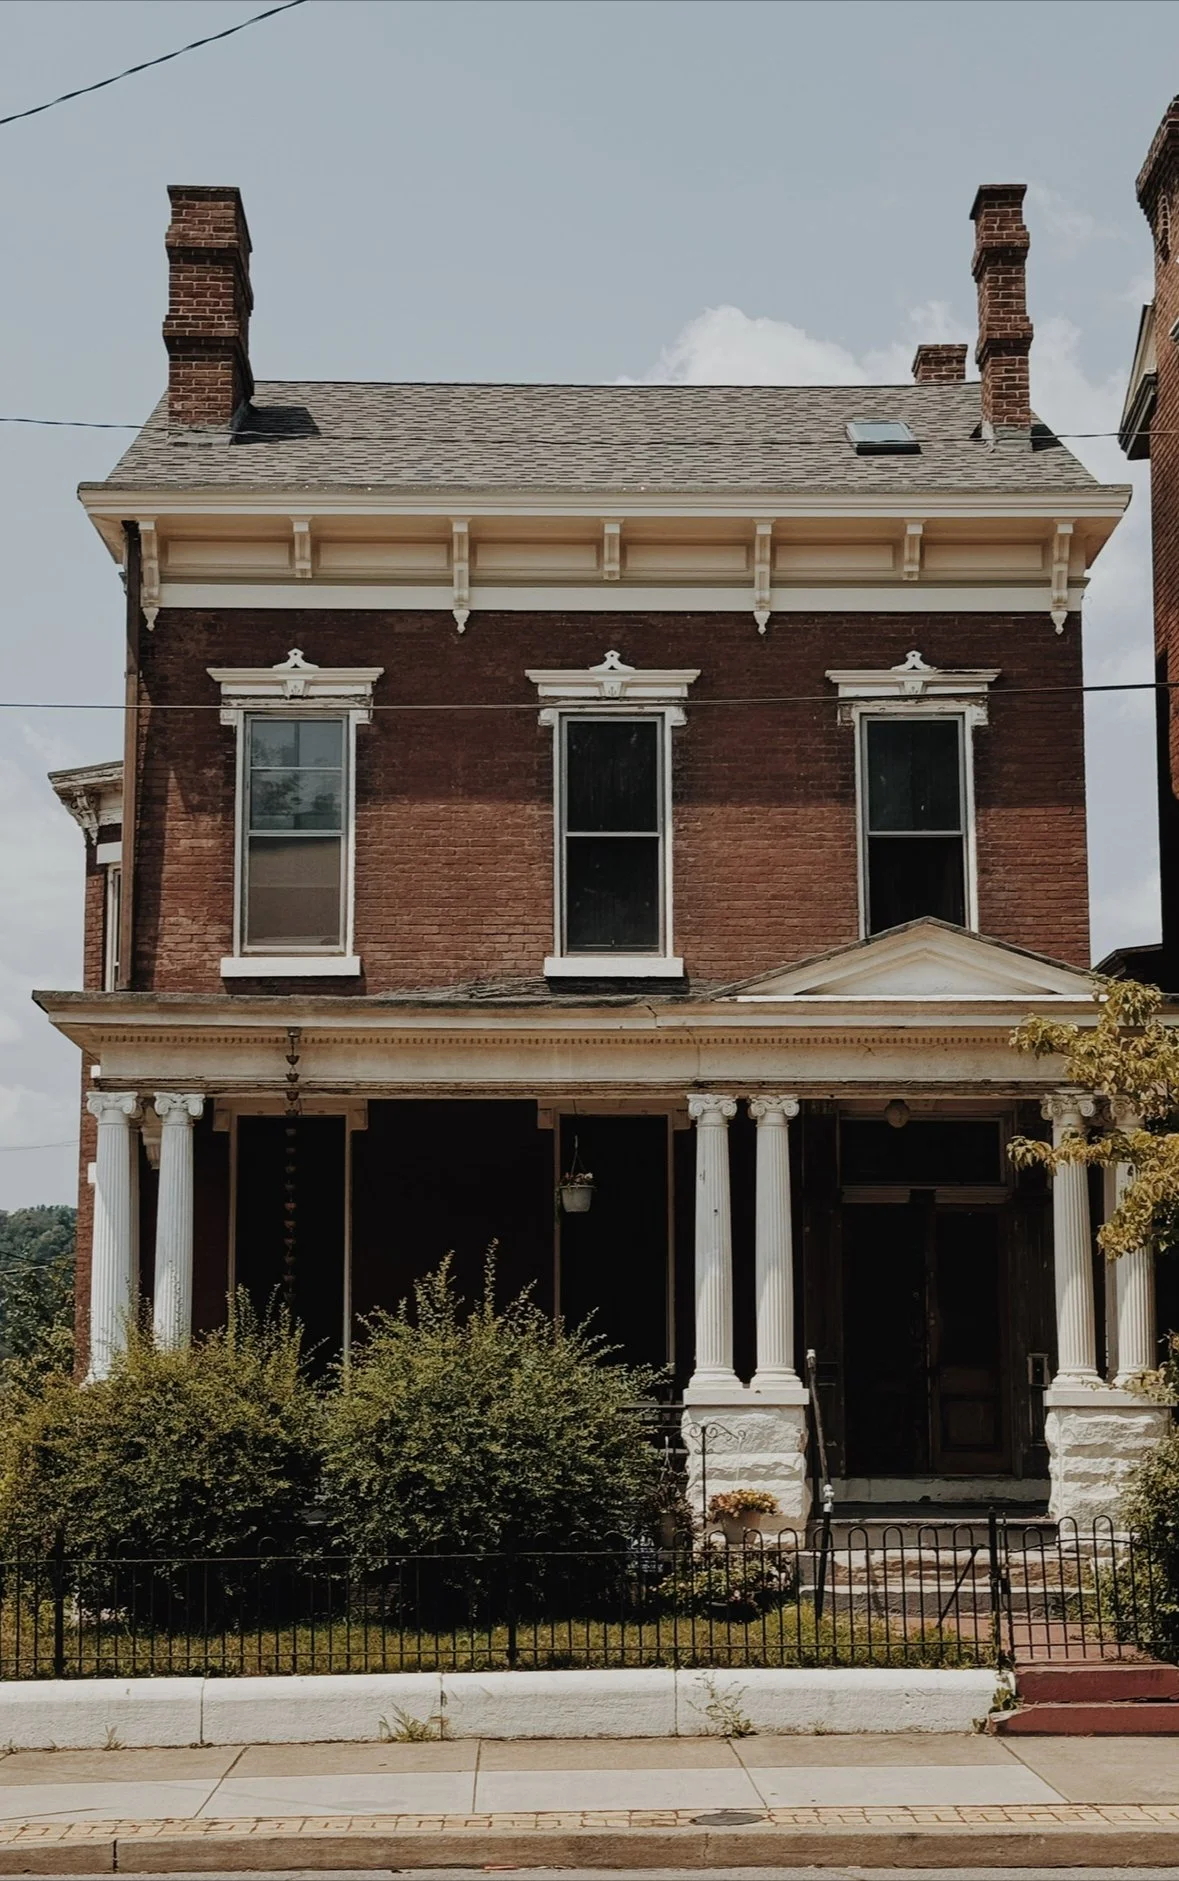
Chapline House is a Victorian-era rowhouse nestled in the heart of Wheeling, West Virginia, a city steeped in history and architectural charm. Built in the late 1800s, the house has passed through generations, and today it’s being lovingly restored by our family (and sometimes friends) with a deep respect for its original craftsmanship and character.
More than just a home, Chapline House is a living story. From peeling back layers of time to uncover original woodwork, to sourcing period-appropriate antiques, every corner holds a piece of the past waiting to be revived. It’s a place where beauty, nostalgia, and creativity converge.
As we restore Chapline House, we’re not just bringing a building back to life; we’re honoring the spirit of Wheeling’s historic neighborhoods and the people who shaped them. You’ll find updates, design inspiration, and behind-the-scenes restoration moments shared here and on social media.
Chapline House is the heart of my work — a symbol of preservation, storytelling, and the timeless value of home.
About Rowhouse Revival
Rowhouse Revival is a creative studio, blog, and Instagram account inspired by the restoration of my family’s Victorian rowhouse in Wheeling, West Virginia. It’s a space where old houses, personal stories, and intentional design intersect.
On Instagram, Rowhouse Revival gives a behind-the-scenes look at what it’s really like to restore a historic home—through the eyes of just one family member (me!) navigating the beauty and chaos of renovation alongside daily life. From sourcing antiques and sanding trim to balancing work, relationships, and a deep love for this town, it’s an honest glimpse into what preservation really looks like.
At its heart, Rowhouse Revival is about breathing life back into forgotten spaces and finding your own voice along the way.